Friday 25 November 2016

Amazing Tips to Prevent Nail Chipping

Do you feel proud after applying a beautiful nail product on your nail bed? After using or applying a nail product, definitely want to look good, but you want the beautiful appearance to last. The major problem most ladies face is the inevitable polish chip. It is not possible for you to help your nails every time. But there are some great tips that certainly help prevent the little nuances that lead to those pesky nail chips.

Dip Powder Starter Kit
Generally, many types of nail products are available in the market and sometimes we purchase them from the market or sometimes we go to a salon. Even, many women like to use nail products at home by purchasing nail kits like dip powder starter kit or french manicure kit. To avoid any type of nail chipping there have many great solutions and you can select them for the healthy nails.

Take Your Time

Never use your nail polish or any other nail product in a hurry. There is an exact process that you have to follow for a long lasting nail design as well as chip-free manicures. You should start the whole process with a base coat, then one or two application of your nail polish, followed by a clear top coat. Now you need to seal the end of your nail or polish by using a clean quick stroke. At last, you need to give your nails some time for getting dry. It will give you the best result and chip free nail design.

Use Good Quality Nail Products

This is the most important step you have to follow. You should invest on a quality nail product. It may attractive for you to purchase a low-quality nail product it will give you a better option to buy a huge range of variety but you should understand that there is a little benefit. You should know that low-quality polish does not last longer and it will  inevitably chip and peel due to its poor quality ingredients. It is better to purchase a good quality product. It will offer you fewer chips, a better performance which in turn saves your money. Also, a good quality nail product comes with high-quality ingredients, chemical free and vegan-friendly. 

You should understand that quality is the main topic when the matter comes to your nail. Longer lasting good quality nails polishes are, less chipping, better performance giver which can save your money as well as hassle reapplying so quickly in the long run. A good quality nail product come with competitively priced offering high-quality ingredients, free of bad chemicals and vegan-friendly.

Protect Your Hands

Our hands are always moving and our nails are subjected to a lot of different mediums throughout the day. We have to do many household works or other works and our hands as well as nails always in the contact of different type of harm full products like cleaning solutions, cosmetic products etc. All of this things are may create some wear and tear on your nails. Even if you are just using your computer and typing something you can see that your nail polish to chip. When you are doing household works then you should use a glove. When you are typing, use the pad of your finger instead of using your nails.

Wednesday 23 November 2016

Top and Easy Amazing Nail Arts For Winter

Nail art is an artistic process to make you attractive and individual. This is the process, by using it, you can show your creativity on your nail bed. Also, you can change your taste as well as design based on the season. Summer has its own flavor and winter also has its own so you can change your nail design based on the season's flavor. Many popular nail designs that have emerged very recently are the winter nail art designs. They are amazing, stunning as well as appealing. 

Here I am going to enlist some of the famous and best amazing winter nail designs just for you. By following them, you can make your look more attractive and appropriate for this coming winter. Generally, many nail design products are available in the market such as acrylic nail powder, dip gel nail, french manicure and much more. By using them you can give an attractive look to your nails.

Transparent Nail Art

Acrylic Nail MonomerThis is a great nail art for the winter season. It would be glossy and transparent one. It gives you a stylish look and this particular design is very stylish in appearance. The whole decorated look gives you the feeling of winter and also it reflects the winter season. The snowflakes and dew drops reflect the weather and along with a french manicure nails, make it look more attractive and wonderful. Besides all of this, you can display your winter creativity on your nail canvas by doing this design.


Sweet Style Nail Art

This nail art also a great option to reflect the winter season. This nail design describes the different color lines of a sweater. The color combination such as blue, white and red make a warm feeling and make you look all set for this winter. Besides this, sweet style nail design displays the beautiful winter colors on your nails and also it gives a message that the winter has come. You can get a great opportunity to display your color taste.

Snowflake Art

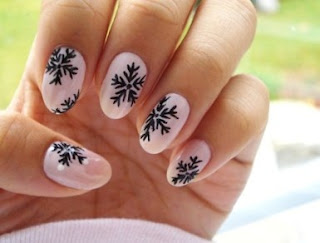
Snow is the greatest symbol of winter so snowflake design is one of the best options to make your nails winter friendly. It is a winter nail design art which depicts these white and glowing snowflakes in different styles as well as patterns is certain to look creative and admirable. They give a great look which is appropriate for the winter season. The dark background and small stars, as well as tree leaves, offer a great look.

Super Winter Nail Art
The super winter nail art is very amazing, creative and appearance. Just like its name, it is very mind blowing and superb. The bark of the tree that has shed all its leaves along with the presence of strong red spot really bring out the real beauty and attractiveness of winter and also make the design look really remarkable and fabulous. The Acrylic Nail monomer the best option to make this type of designs on your nails.

Snow at Night Design
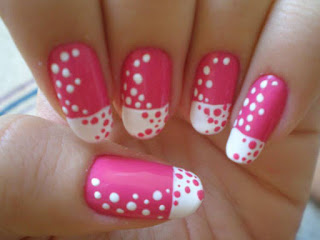
Polka dots are really very popular of this days. Women love them because they offer a very cute look, coy as well as feminine. It is An attractive nail design which shows dots on a black background it sure to look as if it is snowing late night. This is really very creative and pretty design, created especially for the young crowd.

Monday 14 November 2016

4 Amaizing Nail Designs You Should Try Next

We always try to find new design techniques on the internet and try to apply them at home to make our nails attractive and individual. On the other side, use various type of nail products such as dip powder starter kit, nail polish, dip gel and much more is our hobby. If you have ever tried new or easy nail design at home then you definitely know that it is not a hard task to make nails attractive as well as beautiful. You don't need to go to a salon and spend a lot of money for that. You just need to understand the method and you will be a nail design expert within few days. Here some amazing nail design for you which you can try at home and able to make your nails attractive by own.

Ombre Nails

Dip Powder Starter kitOmbre nails can give your nails the attraction that you really wanted. Here have some steps and after that, you can get a fully different type of nails. At first, you need to paint your nails by using a bright polish, then apply liquid latex around the nail bed to save your skin. Now swipe that nail polish and another color onto a makeup sponge, and after that press the sponge onto your nails. You need to give at least one minute to make it sure that the layers have time to dry. Now just peel off the latex, and remove any smudges or mistakes by using nail polish remover.

Acrylic Paint

Acrylic nail also a great option if you want to try nail design at home. Use a white nail polish as your main color, after that point your liquid latex around your nails and cuticles. The two different type of acrylic paint  shades. Now you just need to paint them onto a different makeup sponge. As we all know that acrylic paints blend well and dry very fast, so this design will not going to take a long time. Now you need to give a final touch. Remove excess polish and clean up any messes with remover.

Glitter Ombre
Select your favorite nail polish and just start painting your nails from the tip to down. But before doing it you have to make it sure that most of the glitter is at your fingertips to maintain the gradient effect. You can apply many coats according to your choice but you need to keep the glitter away from the bottom of your nails. 

Eye Shadow with Ombre
If you don't have your own makeup sponge don't need to take the worry, you can still make an attractive nail with an eye shadow brush. You can use a light blue polish for the base, but you can select any shade you want. But you should not forget to use liquid latex to protect your nails. By using your eye shadow applicator apply a darker complementary nail polish to one side, and lightly press it from the middle of your nails to the fingertip. Use the reverse side of the applicator to paint your base polish towards the tip of your nail. Be sure not to eclipse the darker color to preserve your ombre effect. Clean up your nails as needed with remover.

Sunday 6 November 2016

How to Design Your Nail in This Christmas?

Christmas is a holy festival and it is also a festival of colors. Women always look for a chance to decorate herself and it is also a great chance for those ladies who always ready to expose their bountifulness. Attractive dresses, beautiful colors are the main symbol of Christmas. People like to display different type of colors on their body but what about our nails. It is also a part of our body and is also offers a great option for us to display our creativity, individuality, and color. But before decorating your nails in this coming Christmas, you need to select the best color and best design which is appropriate for the holy festival Christmas.

If you are new in the world of nail design then it may little hard for you to select the best color or design for this Christmas. If you have a lot of experience on nail design, still you may face a problem that what color you should select and what you should not also what design is appropriate for the Christmas party. Here is the detailed guide for you to make your journey smoother for this Christmas.
Nail Designs for Christmas

Basically, many nail design tools are available in the market and by using them you can easily decorate your nails at homes such as acrylic nail kit, dip powder starter kit, french manicure kit and much more. The most amazing thing is that all of this kits offer  a different type of tools and colors so you will get everything near to your hands if you purchase one of them. But make it sure that if have purchased a quality product or your nails will become unhealthy in this coming Christmas.

Now, select the best color for your nails. As we all know that the Christmas is a colorful festival so your nail's color should be attractive, not pale. You should use bright colors to make your nails attractive such as red, green, white and blue, and don’t forget the glitters. All colors are bright, still, you can select from current color trends which are muted pastel colors, these are typical colors with less brightness and more paleness.

If you select pastel nail colors then also you have lots of options. You can purchase pastel colors locally or from any online store so you can get it very easily. If you are still facing problems to select the right colors in this Christmas, stop thinking and select from the above mentioned bright colors. Also, many nail colors are available in the market which is included with glitters. You can try them to make your nails glossy and attractive at Christmas night.

After selecting the perfect color for the Christmas day now it is the time to select the perfect design to match yourself wit the Christmas day. There have plenty of designs are available for nails but all of them are not appropriate for Christmas. You can use Christmas symbols and integrate this into your nail designs. Besides that, you can use much more other designs such as snowflakes, elves, dear, Santa Clause, Gifts, bells, candy canes and much more to decorate your nails. To make all of this, you just need a little bit of creativity and a perfect combination of colors and symbol. A perfect color and symbol combination can give you the best look in this coming Christmas.

Thursday 27 October 2016

Major Differences Between Gel and Acrylic Nails

A common question always available among nail design loves that which product work well with acrylic nails or gel nails? There has a broad range of products are available in the market so people get confuse that what is the best option for them. Even sometimes a question comes from nail design lovers that what is the major differences between gel and acrylic nails? Here are the major differences between them. But before that, you should remember that both work well with trendy nail products, however, the process of using method may change slightly.

In this nail design era, acrylic nails are the more common and popular choice. It is the first selection of women because this nail system stays longer and give a natural feel and look to your nails. Also, a user can use them over a whole nail or just a portion of a nail to make a tip effect. A mixture of acrylic liquid and Acrylic Nail Powder is applied to the nail to make any desired shape. It only takes some minutes to give your nails a different shape as well as look.

DIP POWDER STARTER KIT
Gel nails have two different types. One of them needs to be cured under ultra-violet light. Normally, it knows as light cured and another is cured on their own without any type of out support, knows as no-light gels. But in this modern era light cured gel is most popular . Even they have the disadvantages like a user has to use UV rays but still people like to use them. On the other hand, no gel lights work with a gel activator to cure your nails.Normally, nail experts brush or spray in on the nail. Some are cured by dipping into the plain water.

Both nail systems, gel, and acrylic offer similar results. They can lengthen, strengthen, change or shorten, even they can give your finger a perfect look. With both nail systems, you can apply trendy nails products at the time of finishing. But gel offers a more glossy finish while acrylic offers a slight matte finish. Also, you will get the freedom to make french tips, air brush or make different types of polish with both nail systems. With an acrylic nail, you will get a perfect finish and look by using Acrylic Nail monomer.

There have lots of benefits if a user selects acrylic nails. Acrylic nails are easier to repair if broken. Also, a user does not need to visit a salon regularly because of home repairs and take cares are quite simple with acrylic nails. On the other hand, removing acrylic nails are also easy. A user can remove them easily at home. So you do not need a nail expert if you want to take care your nails. These duplicate nail systems are really very strong if applied properly and they can stay a long time, even more than 6 weeks. On the other side, different research says a duplicate nail system can damage a real nail. Also, the look of a duplicate nail is less natural than gel nails.

There also have lots of benefits with gel nails. This nail system offers a glossier finish and looks more natural than a duplicate nail system. The drying time gel nails are quicker. If you use a light then it will take only 2 minutes. The extra advantage is it does not produce and odor and also there is less filing as well as shaping hazard during the process of application. But this nail system does not stay as long as acrylic nails and the process of this nail system is hard to do at home. Gel nails are more difficult to remove and harder to fix.

Both nails systems are getting more and more importance every day so select the best option according to your daily lifestyle and needs. A perfect selection can give you the perfect result and also reduce the cost of nail design.

Tuesday 27 September 2016

Basic Mistakes We Make in DIY Manicure

Manicure is the great way to make our nails and attractive. In this modern era, different types of nail products are available in the market such as french manicure kit, dip powder, dip gel and different types of nail polished and much more. Unfortunately when we apply then, many times we ignore the proper application process which the nail company has mentioned on the package of the product. As a result, we gain unhealthy nails and lost the natural beauty of a nail.

Nowadays many women do their manicure at home because it is less expensive and you can give extra care on your nails by using good quality nail products as well as germ-free tools. But during this process, we made many mistakes. DIY manicure is one of the famous manicure systems among the girls. There have many essential tips that can make a huge different and give you the exact look which you want. You just need to give extra focus on some basic things.

French Manicure Kit
The most basic thing we ignore is to prepare our nail bed. It is really important to prepare your nail bed before starting your manicure work. You need a cuticle remover to remove all bad cuticles. Also, you need to make it sure that your nail is clean and free of any skin or it will give you some bad effects. You can use polish remover to clean your nails and also can use a metal cuticle pusher to clean all cuticles. 

One more mistake we do before a manicure. You have to make it sure that you have done your nail file in only one direction. If you do it different directions then it may the cause of more peeling at the tips. If you push it towards one direction then it will help the ends stay a bit more structured. 

You should not press the brush against your cuticles at the back of your nails. Leaving a small gap between where the color starts and your cuticle area will look more professional and lead to less peeling from the back. Also, you need to wash your hands and do a prep treatment before polishing.

After finishing your manicure work you should give sometimes to your nails for drying. Even with faster to coat, you need to give appropriate time to your nails because without giving appropriate drying time if you do any work then it may destroy your all hard work.  

Every nail product has its own application process as well as timing so before do it by own you should make the whole concept clear for the better results.

Sunday 25 September 2016

How to Getting Relief from Yellow Nails

Yellow nails are the unusual medical syndrome that included lymph edema, yellow dystrophic nails, and pleural effusions. It is also related with constant coughing and chronic sinusitis. Sometimes the cause of yellow nails is wrong nail product application process. If you use a nail product like acrylic nail powder by following the wrong method then it may the cause of yellow nails. Normally, it affects adults. Here is some guidelines as well as process to keep a safe distance from yellow nails.

Acrylic Nail Monomer
Baking Soda to Protect Your Nails
Baking soda works well for removing yellow nails. It helps to remove stains from the nails through its bleaching and exfoliating properties. Baking soda works effectively to lighten the yellowness of the nails. You should use the natural process to get relief from yellow nails. After making a paste of baking soda by using some water, you need to rub it on your yellow nails and keep it for five to ten minutes then make it clear by using water. Try to do this process two times in  a week.

Use Lemon
Lemon also play a great role to remove yellow shades from nails. Basically, it works as an agent for decrease yellowing of the nails. It works as an astringent. It contains a natural bleaching powder that makes a good environment remove yellowness from your nails. After extracting juice from a fresh lemon, rub it on your yellow nails and then wash your hands with warm water. Use this process two times in a day for a better result.

Apple Cider Vinegar
Apple cider vinegar is a very useful homemade option. It contains anti fungal property that helps to escape from nail infection. It helps to decrease every type of nail infection that responsible for discoloration. In apple cider malic acid, vinegar as well as acetic acid help to reduce the discoloration of nails.

Acrylic Nail Powder
Orange Peel
Orange peel is famous as the best remedy for staining. It helps to remove the discoloration from your nails. Orange peel has very high volume of vitamin C that helps effectively in reducing of stains. You can use this best option at your home to get the best result. At first take a fresh lemon and rub it on your nail bed after sometimes washes it by using warm water. It can be the bets way to improve your nails health.

Use Tea Tree Oil
Tea tree oil has antimicrobial and antiseptic properties. It helps to protect from the infection. It also helps to restore the natural nail color. It is really an efficient home remedy if you are facing fungal nail problem or if you have yellow nails. Also, it has natural fungicide ingredients that help in remove of the strain. You can use it for an effective result.

Should Avoid Nail Products
Many times we try to hide our infected, unhealthy or yellow nails so we use nail products such as acrylic nail monomer or nail polish to make it beautiful. But you have unhealthy nails or fungal infection, you should not use any nail products on your nail beds. It may the cause of many bad effects on your nails. Also, nail polish or other nail products reduce you nail improvement process.

Thursday 18 August 2016

Perfect Nail Designs for Your Child’s Small Nails

You accept or not, nail art is a trend of the modern era. If you have a young child who likes beauty and fashion you should give her a manicure because it is a great way to do an enjoyment and spend some bonding time with your child. But there are some little challenges you may face when you want to give a manicure to your child. The main problem is that the canvas of the nail is tiny and you don't have a huge option with a manicure with your child. So, it is advisable to start with just one embellished nail on every hand to serve as an accent. It is a traditional look that is the perfect option for art newbies.

Dip Powder Starter kit
Go for Non-Toxic
The first and important thing is, keep the whole thing on the safe side when working with kids. As we all know that many nail kits are available on the market for adults like dip Powder Starter kit but they are not appropriate for children. There have some great non toxic options are available on the market, so why not go for them? Many quality nail products are available on the market which are not only toxic free, also they are eco-friendly, orderless, as well as hypo allergenic. Thanks to those products for their bright colors and eco-friendly manners. Also, they dry fast so it is really very helpful for the children.

Use Striping Tape For Design
A striping tape is a very useful thing. It can be used over cured polish for an instant strip color. You can show your creativity with this tape and also can create simple stripe to complicated geometric shapes on your child's nail. It is also easy to cut the tape little longer than you want. Place it on the nail and after that use a small pair of grooming scissors to trim off the extras. Also, you have one more option with this tape. You can also apply the tape before polishing and then peel it off to fashion a cool and amazing design.

Use Nail Art Pens
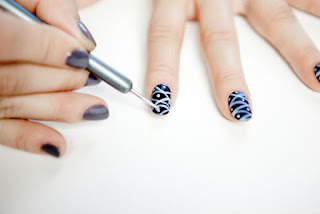
You have the artistic capability and you have the ability to draw excellent design then you should go for nail art pens. Sketch your creative design by using nail art pens. The pen works like an applicator and even can draw on the smallest part of the nail and there is no limit to what you can make. You can take help from nature, holidays, or you can take help from the patterns on your favourite clothes.

French Manicure Kit
 Use A Nail Art Brush
The brush that is housed in the cap of maximum nail polishes is sized for adults and older children. Trying to use them on a tiny nail is really difficult as well as frustrating. So, you should go for a flat nail art brush instead for a faster and easiest manicure. You have many options with the brush. You can dip the brush directly into the bottle or drop some polish onto a bit of waxed paper or aluminium foil and load your brush by using that.

Decorate By Using Nail Stickers
Nail stickers are the best and amazing tool for kids. It is easy to apply. Just paint on a base color and after making it dry, you can just peel and stick on the adorable little motifs. Children can easily add stickers themselves by using nail stickers and also it is great fun for them. If you want to really make their day then let them decorate their nails.

Tuesday 16 August 2016

Why You Should Go For Gel Dip Powder

Have you ever used a gel dip powder manicure? If your answer is no, you are missing out. It is all the lovely results you love about getting your nails done at the salon or at home. But also one major thing is that it is also more durable than any other nail polish your have used in past. Here I am going to give some major reasons why you should use dip powders.
Dip Powders

Last Longer
If you are a nail design lover then you surely know that the most frustrating thing is having a deal with ugly chips after doing your nails. Many types, it needs to be redone after doing your paint job on the nails. But all of this frustrating things not going to be happen with dip gel powder. A good dip powder manicure will stay absolutely flawless for 2 to 3 weeks. Also, gel dip powder is the chip as well as crack resistant, so you can use beautiful manicure longer. Not only your nails look perfect with gel dip powder, they also fell just as stronger and they look like. Even, dip powders are even stronger than any other gel polish and just durable like an acrylic.

Save Your Pocket
Definitely, you know that how much you spend on a salon for a gel or acrylic manicure. It may be 40$, plus taxes. And you have to pay for only one manicure. But you can do dip gel powder on your nails many times with $40. So, stop wasting money. Buy one 2 ounce jar of nail dip gel powder which lasts about 50 manicures. You can save lots of money by doing your own long-lasting gel manicure at home without using any lost lasting equipment and products which will stay for a couple of weeks.

It Looks Beautiful
Everyone like beautiful and attractive nails. Gel dip powders will help you to get a beautiful and amazing look and the most important thing is all you can do by yourself only. So, you don't need to do a journey for salon regularly. When you use dipping powders, your attractive nails become more attractive as well as it gets an incredible shine and looks perfect every time. On the other hand, dip gel is the easiest way to enjoy a flawless French manicure. The pink and white color is easy, you just need to dip your nails in powder. It is really strong and attractive but still it looks lightweight and flexible.

Dip Gel Nails

Good For Your Nails
There have many nails products, after using them you felt that your nails become weak. There has a reason for that. Because they contained an unknown ingredient that makes your nails weak. Many people are even allergic to the products. Not with nail dip gel powder, the problem will arrive. Because a good company's gel powder comes with Vitamin E for healthy and growing nails. Many nail products are really harmful. In fact, the glue used in the liquid polishes is just similar to what you may find in a hospital used to seal up cuts in place of stitches. So, you can understand that it is safe for your health. After using them you can feel that your nails become stronger and healthy.

Easy To Use
The best part with gel dip powders are they are very easy to use. You just need to follow few steps to get a beautiful and attractive nails. Many ladies always keep a safe distance from doing everyday manicure because it is really hard to apply and also needs UV or LED lights. But on the other side gel dip powder is easy enough. Anyone can apply them on their own nails, even young girls also. It also takes less time than any other nail products.

Friday 22 July 2016

Is Your Nail Polish Toxic?

The world of nail products is one of the biggest industries in the world. In today's era nail products are getting more and more importance among the modern women. Women like to make their nails more attractive, and creative. Also, a good nail design displays the status of a woman. Many nail products are available in the market and salons but what is the right product for our health. Many women pay particular care to their nail more than their health. But a nail product with the wrong ingredient can harm you very badly. If you are also a nail design lover and like to make your nails creative, then it is the time know more about low-quality nail care products.

Nail Supply Products

Some low-quality nail polishes and other nail products used at salons and labelled toxin-free may have high levels of toxic chemicals, according to the many published reports. You have to remember that the labelling does not always reflect the exact list of ingredients. Recent research says that the three chemicals dibutyl phthalate, toluene, as well as formaldehyde commonly called the toxic trio. The mentioned compounds have been of concern for their potential health risks, especially to nail salon workers or nail experts. Within recent years, some reputed nail supply products makers have removed these chemicals from their goods completely, after that they use label non-toxic.

But a user should remember that, in many cases, some small companies are using inaccurate labels. As a user, it is very hard for us to understand about the label of the product. Some nail products do not carry a toxic free label has none of the chemicals in them, even the researchers also found. According to the professionals, most of the brands involved are not main brands and also not found in every salon.

Toxins in Nail Polish
The California scientists tested many nail colours or lacquer. They also included some top coat, thinner, nail art, base coat as well as a top base coat combination. They were trying to search a chemical toluene. This chemical is may the cause of birth defects and also development problems in children of a pregnant woman who have had extended exposure. They are also searching for dibutyl phthalate, which has been linked to birth problems in studies involving lab animals, and formaldehyde, a carcinogen.

If you are a lover of nail design and a regular traveller to nail salons, you should not go for the labels of nail products. It is hard to find a good quality nail care product but still you can do your research through various channels. One of the best ways is, do your research on the internet. Research about the product which your nail expert use. Make sure about your nail care products which you are using. You should not compromise with health. Even a bad nail product can damage your nails permanently. It is a wise idea gather some information regarding various nail care products. Go for the good quality not for the quantity.

Monday 18 July 2016

How to Apply Nail Extensions Perfectly?

Good looking hands have always been part of our ritual from ancient time. Women love to decorate their hands and take care of nails. In the old Egypt, long nails were the symbol of status and wealth. In present times, beautiful nails are the major part of our personality, creativity as well as individuality but not everyone blessed with long and healthy nails. Nail extension is a way to get those lovely and beautiful look nails.

Nail Supply Products

Nail extension means adding a duplicate tip to your original nail end to give it length. It then gets covered by acrylic, fibreglass or gel. A nail can also be formed on your natural nail. In this whole process, you don't need to use any tip.

Acrylic Nails
The acrylic nails are developed by mixing liquid monomer, and a powder polymer, which when combined form a hard protective layer that sculpted over the natural nail. These nails become hard when exposed to the air. To complete extension, a duplicate tip added on the nail before using an acrylic mixture. After that, the nails extensions are shaped and buffed for a shiny finish.

Gel Nails
The gel is hair gel type of consistency that used either on the top of a duplicate nail, or you can directly use it onto the natural nail bed to strengthen the nail and promote long nail growth naturally. It differs from acrylic nail system in terms that no mixing is needed to develop gel, and the nail must be cured in a UV ray or Ultra Violet ray to create a strong gel extension. Gel nail is a better option for creative nail design.

Silk Nail
This nail system is less popular. In the whole process of silk nail, many steps are involved such as cutting pieces of fibreglass or silk to fit the nail bed or tip. There are three different types of nail extensions than can offer longer nails, but all of them need help of a nail expert and a quality nail salon. But still, you can do you own nail extension at home by following some simple steps. There are many types of artificial nail tips are available in the market to do nail extensions at home. You can try.

Thing You Need
To apply nail extension at your home, you will need following things. There are many types of nail tips available in the market such as white, bright, glitter coloured with beautiful designs. The nail tips are commonly made of plastic. Buy one according to your preference. Also, nail glues are very easily available now in the market.

Acrylic Nail Monomer
Follow The Steps
At first, you need to wash your hands, and also you have to remove any polish or glue or anything with the help of acetone. Make sure that your nails are clean fully. Now push your cuticles back. Now you have to buff your natural nail so that it does not have any shine or moisture on your nails. If you already have long nails then cut them correctly and trim the corners to make a perfect grip for duplicate nails.

Now it is the time to come to the most important steps. Select an exact size of nail tip. This step is important because if you choose a wrong size, then it will look dreadful. You should take the time to select the exact size of the tip which matches the c-curve of your natural nail bed. After selecting your tip, use glue on the hollow part of the tip and use it on nails. Give it a little pressure to avoid air bubbles. Make yourself careful because the glue is very sticky. Now left your nails for 30 seconds and after that cut the tip of your nail according to your required length. Remember that; you should make it longer that your desired length. Now at the final step, shape your tips and sides of duplicate nails. Make your nails colourful by using nail polish design.

It will need a little practice, but you will learn very easily. Now you are ready to do all the nail extension processes at your home so left all the work and made your nails more attractive.

Wednesday 13 July 2016

6 Common Tools You Can Use For Nail Art Dotting

Are you a big lover of nail art? If yes then you know that many times visiting a big nail salon is just not feasible. But there has a good news for you, now you can create your own nail art with dotting tools that are very far from expensive. If you are a fashion lover, this article will surely speak to you. Many nail products are available on the market such as dip powder kit, dip gel, acrylic nails and much more but as we know it is very expensive to visit a salon regularly. Check out these magical nail art dotting tools for developing a perfect nail art design at home.

Dip Powder Kit

Hair Pins

I am talking about simple hair pins that get a small corner in your cupboard. Hair pins are most common things women use. This ignored hairpin can help you customized attractive nail art dotting designs easily. Hair pins have smooth ends so you can use them to make beautiful dots on your natural or artificial nails. You just need to dip one end of the hairpin in your favourite nail colour and you can get clean dots on your nails in no time.

Paint Brush
Paint brush also a very common thing in our houses. Still, it can give you beautiful big dots on your nails. If you like big dot design on your nails then paint brush is an appropriate tool. Just dip your paint brush in your favourite coloured nail polish and make big dots on your nail bed.

Ball Pen
The tip of a ball pen can be used to get, clean dots on your natural or artificial nails. This dots look tidy even when the design is crowded. Ball pens can make one of the best nail art dots. It also offers numerable clean small dots very easily. But you have to make it sure that you use an empty pen to get a clear look and seamless finish.

Match Sticks
Matchsticks are the most common household things so it is very easy to get. Matchsticks from an interesting nail art dotting tool that offers two sized rounder dots. You can use both ends of a matchstick to get the desired dot. The black side of a matchstick gives you a round dot and the white plain side offers a square dot that looks really very unique.

French Manicure Kit

Toothpick

Toothpicks are a gem in the list of home tools for making nail art. Both the ends can be used to make beautiful dot patterns. The sharper edge offers very small dots that can be lined in a circle to get a professional nail art design. You can also make different patterns like floral dots, parallel designs and much more with precision, using sharp side of a toothpick.

Fancy Ear Rings
It may make a funny sound when I say use an earring to make a dotted nail art design. Try it out yourself and see the amazing results. Small fancy earrings have pointed ends that can be used to make clean and beautiful look dots on nails. Also, few earrings take the shape of pearls that are very small. Those very small and rounded earrings can also be used to make exceptional dotted nail art designs.

Surely you have all these tools at your home. And after getting them, you will be all set for some fancy nail art. But you need to remember that you would still need to get a manicure done. You can also buy a French manicure kit and do your manicure work at home. Also, never forget to clean the tips of all the home tools that you like to use to create your own dotted patterns.

Thursday 23 June 2016

How to Select The Color of Nail Polish

The nail color is the main key element in our everyday looks and can make hands and feet look clean and in tune with our dress, personality, skin tone or the opposite. Today, there are many options, why finding out the exact color glaze can be a bit tricky. If you want to find out a nail color that suits you the best or most decorated for each occasion then this stop is written for you. Pay attention to the tricks how to select the color of nail polish.

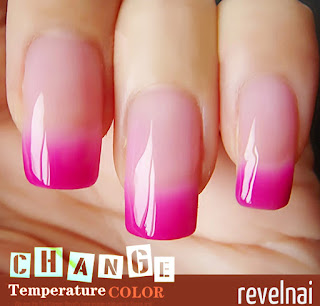
Change Temperature color
Nail, especially for those of the hands, are always visible and should look perfect at every time. So, it is very important to select the color of the glaze granting to the time and place to make the best of impressions. Definitely, if we go for an example, to any professional event or a job interview will be convenient nail polish in natural colors and shades may even suffice to use a light coat of gloss. A good selection for such occasions as well as for job that needs sophistication, is the French manicure look a safe bet as well as very elegant. You can use a French manicure kit for instant preparation.

But for any occasion that does not need that level of sophistication, you can show and enhance the attractiveness of your nails with more intense, bright colors like violet, blue, neon, red shades. On the other side, the styling and costume is a factor that can offer many clues to selecting the exact color of nail polish. You should check all items from your closet  to see what colors and what colors do you generally are predominant. You can orient yourself and select nail polish in the same color program your clothes.

The color of the nail polish according to the skin tone. This is another way by which many women are set to select nail polish. Not all of us feel great the same tones and therefore, it is good to know what are the most profitable to us.

If you have pale skin then soft colors like cream, pink, blue, light pink, peaches are preferable to avoid too dark colors. Fear skins look much better with clear nail polish in shades of purple, light pink, raspberry, fuchsia as well as orange soft. On the other hand, intermediate skins look good in normal, with any color of nail polish. There has a long list of shades between those who can select as red, maroon, yellow, orange, pink. You should remember that the tanned skin looks great with pink tones, corals, ice blue, light brown and copper tones.

Dip Powder Starter kit
The equal color selection for nails and lips. Wear the same color on the lips and nails is the best way to have a more balanced and perfect look. For examples, a red, coral, fuchsia or pink lipstick always give you more attraction if you combine it with nail polish also the same color. You should always try to select those shades of lipsticks that is most profitable to your skin tone. At the time of selection the color of your nail polish, you should take into account that the light tones achieved nails look longer and conversely, dark colors make you look shorter. So, if your nails are too long will be suitable to select lighter and natural shades of paint.

With a long list of options now a day, it is easy to make nails attractive by using many kits like dip powder starter kit, French manicure kit and much more but if you are one of the girls who love fashions and always like to up to date then do not hesitate to try new colors.

Monday 20 June 2016

What Your Nail Expert Doesn't Want You to Know About Gel Manicures

Gel manicures are one of the most exciting beauty innovation of the last many years and also it is the most common choice of people like acrylic nail monomer. A manicure that stays for two solid weeks without any special care even does not need any dry time. Still it has some nice big downside. The technology is even jumping up in do it yourself versions and the home gel manicure kit like French manicure kit is one of the main reasons for that. But after getting some unfortunate experiences with both nail salon and at home versions of gel manicures, we select some different ways.

Acrylic Nail Monomer
Now for a moment, let's forget about the stunning, shiny and beautiful looked manicures and talk about the dark and horrible dried out underbelly of gels. While these manicures look undeniably amazing, the UV exposure needed to set the gel and also the potential damage to your nail beds are two significant factors that con not be ignored.


Is The UV Light Exposure an Issue?
The process gel manicures work is that the colour is painted on and then cured underneath a UV light. This procedure is repeated several times per hand. It os what makes the nail polish robust and durable. So is it bad for your skin to have your hands under a UV ray? We all know that UV light exposure is merely not good for our health. Also, there is some direct evidence that the UV light exposure you get from a nail process is a potential danger to our health. However, if you want to start with them on an everyday basis in your 20's or 30's and continue, the risk will be higher.

However, remember that it will not be entirely useful part of the gel manicure process is cleaning the nails, therefore, the skin around the nails and the fingers with acetone. If a user has to remove the prior gel manicure, fingers are soaked in acetone for at least 10 to 15 minutes. No sun protective product will last through it.
Nail Design
Getting the gel off is an original bitch, it needs more than 10 minutes of soaking in 100 percent acetone, either in a bowl or individually wrapped with foil. Then the gel is scraped off after it softens. The situation of your nails afterwards is nothing short of horrifying. Many people don't like the fact that they dry out the nail bed tremendously which, over time, makes your nails feeble which makes them break off very easily.

However, many people also acknowledge that the durability is surely a plus point for a nail design. And to save your nails from becoming or a total mess, you need to be sure to moisturise your nails and cuticles with vitamin E oil every day while you have gel on your nails. To do a manicure at home by using a manicure kit like dip powder kit, you need to have enough confidence also you need to have a firm grasp on nails. To save your nails from harsh, stripping effect of the 100 percent pure acetone, you need to use cuticle oil first to protect your skin and after that soak your tips afterwards in a bowl of vitamin E oil, or you can use coconut oil for some fast rehydration.

Tuesday 14 June 2016

How to Remove Acrylic Nails

Acrylic nails seem to be the craze in today's nail design world. But removing them be a little bit challenging task, especially if you have not taken exact care of them. However, the good new is that you have visited the right page if you are looking for the solution how to remove acrylic nails. Here are the two primary ways to get the job done.

Things you Need

To end the task successfully, you need some things which are easy to get in the market. All of this will help to remove your acrylic nails. You need a nail clipper, nail polish remover, glass bowl, olive oil, moisturising lotion, petroleum jelly, clean towel, orange wood stick, nail file and nail buffer. May you need to give a visit to market for collecting all these things but you can use them many times when you are trying to remove your acrylic nails.

Acrylic Nail Powder

There have many steps you need to follow if you want to remove your acrylic nails correctly. First of all, you need to start with trimming your nails as short as possible and very carefully so that you don't hurt yourself. This trimming process makes the whole thing easier as well as quicker as there will be fewer acrylic nails to clean. After trimming your nails now, it is the time to only getting a glass bowl and filling it partly with acetone nail polish remover and then setting it aside before using any substances or lotions on your hands.

Remember that you are not removing nail polish or French manicure from your nails so you need to give an extra concentration to save your nails from unnecessary damages. Now the third step is using the nail file to buffer your nails to remove the gloss completely. You need to make it sure that you move around the nail often and uniformly because you should not focus on the single spot. Now clean off the dust from your nails after completing this step.

Now it is the primary task of what you are preparing your nails, which is removing acrylic nails. It is the time to apply a thin layer of petroleum jelly to the skin of your nail bed. This process will make you sure that your skin will be protected from acetone nail polish remover. Also, the thing you should know that it is the best to apply petroleum jelly than to skimp out on it. Now dip your nails into the bowl of acetone nail polish remover for around 15 to 20 minutes or until the glue that binds the acrylic nail to your natural nail bed starts to come off.

Acrylic Nail monomer
 When the glue is disconnected after dipping your nails into the bowl of acetone nail polish remover, you will follow that your nails have gotten mushy. Now very slowly try to remove the acrylic nail, and if you face some resistance, you should repeat the step. Do what you want to do but never try to attempt a force or pry your acrylic nails off because it may cause some serious damage to your nails and also the cause of infection.

Now you are near about the end of the process. Remove your acrylic nails and wash your hands by using water to get rid of the petroleum jelly, also the acetone nail polish remover from your hands. Also, you can use a buffer if there is any leftover glue. Now the last step is involves using cuticle oil or olive oil to moisturise your nails after drying then whole nail removal procedure. It is advisable that different type of nail products have a different kind of removal process. If you are removing dip powder, then the process will be different so don,t follow the same process when you are removing another type of nail manicure or duplicate nails.

Monday 9 May 2016

5 Top Nail Designs For Holiday Season

As we all know that the holiday season is filled with parties, events, festivals to attend. It is important to find the exact winter party outfits to last you all season, you can bring your attire one step forward with gorgeous holiday nail designs. In this holiday season, the best and hottest nail art trend is glitter arts, so get your manicure in this holiday season with these beautiful and amazing colours and patterns.

Super Sweet Candy Cane Mani

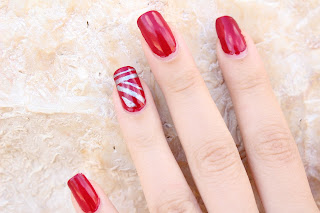
Give your nails creative look with a sweetness by this nail design that inspired by candy canes. This very easy to do look uses a flat, white nail polish base and features red glitter stripes throughout. This nail design is simple enough so you can easily do at home and also can make your nails prepare for the party but you can also make a journey to a nail salon. It's red strips and white background make your nail attractive also it creates an individual look.

Make A Snow Look

For a winter festival look, you can consider this snowy nail art design. With a flashy blue base as well as a solid white snowflake design on top, your nail art will definitely pop and attract people's eyes. However, this nail design is little complex than other nail designs most of us are use to attempting, but still you can try it on your nails by using a toothpick to carefully create the snowflake designs on your nails. The beautiful snowy look creates a winter feeling on your nails and also it matches the season and party environment.


Snowman Design

Another best winter festival nail design is snowman art nail design. With a glittery and beautiful silver base coat, use solid white nail polish to develop a snowy French tip and a little snowman on an accent nail. You should use dark black, red and orange colour to finish your frosty design. Top off the rest nails with snowflake dots for a blizzard of nail art flair. It is also appropriate to prepare your nails for a winter party or a winter outfit.

New Year's Nail Art

For a fierce yet very simple nail art look to help your ring in the new year, go for the gorgeous look. For using a nude base colour, paint your whole nail first. If your nail bed is not smooth then acrylic nail powder is a good option for you. Then use a bright gold nail polish  and create a thick French tip. At last use a shiny solid gold, polish to join a thin line between the glitter and the nude base. This looks creates the trendy nude tones and seasonally party glittery gold to offer you the exact holiday nail look.

All Over Glitter Nails

For a very simple but still festival holiday nail look, you should go for the all over glitter design. Clean your nails by using acrylic nail monomer before applying the nail design.Then select the trendy neutral colours, such as gold, silver, and nude pinks add a festive flair to all holiday attires. If you are trying to match you nails to your ensemble season, Go for hot holiday colours such as reds, royal blue, forest greens nail polishes.

Having the best manicure kicks your festival holiday look up a nick. By selecting one of these hot holiday nail designs, you will give your holiday party an extra look. The more flexible part is many of this designs can be created at home. However, you can also take this beautiful nail looks from your favourite nail salon.

Wednesday 6 April 2016

Things you Should Know About Shellac Nails

As we all know the manicure industry is lively about a more durable option shellac nails. What is shellac? It is a nail treatment which is sometimes referred to as a gel manicure. Offers to last as long as a whole month without chips, breaks or need for an extra coat.

If this sounds like your manicure dream coming true after using a long manicure products like dip powder or acrylic nails. But before heading to a salon you should know the pros and cons and remember to visit a nail salon that practices good health and is an appropriately licensed.

Healthy nails before gel polish

Shellac is the best choice for durable nails but you need to start with healthy fingers. If your cuticles and nail beds are damaged and peeling then you should not use gel polish or shellac on them. These will affect the stability of your finished nails. So it is the best option to fixed the problems before using the treatment.

Stays up to a month

The longevity is the main benefit of a nail treatment. Only, for this reason, gel polish is cured with UV or LED light. Almost every shellac will stay around 14 days. Some people find that the nail polish stays for a whole month but the growth of new nails may send them back to the nail salon for an adjustment. Health experts believe that an LED light is a safer way to use gel polish and also they suggest to apply a sunscreen on your hands prior to the application of the polish or use gloves with the fingertips cut out to save your skin from UV ray. Experts also suggest to using lotion regularly to help duel dry skin and brittle nails exposed to acetone.

Practice at home


When gel nail polish will stay longer than traditional nail polish, it needs home care to keep the nails healthy and the polish looking good. Many nail supply products are available in the market but you should apply cuticle oil to your nails twice a day. It will help to penetrate the porous polish and also nourish the nail bed.

Carefully remove gel polish

Shellac requires more time to remove than traditional polish and also need a special process to protect nails and cuticles during the time of the process. It is best to return the salon to have your nails soaked and wrapped in an acetone to clean the gel polish. The wrapping process uses the heat of your body to loosen the polish so it can be removed. It is much better than peeling the polish off. Buffering will help you to make your nail surface smooth. 


At the end, you can buy from home gel polish kits that come with a curing lamp to do your own nail work. If you need a professional look then you will get a complete kit that includes many products like  dipping powder nails, dip gel and much more. But you should remember that a nail technician can do  a better job  so if you are not an expert then go to a salon and make your nails beautiful.

Wednesday 16 March 2016

Gel nails are really a type of duplicate nails or not

Gel nails are really a type of duplicate nails which very closely resemble our organic nails. Basically gel nails are just similar to acrylic nails because they are both produced in a combination of any monomer or polymer. The monomer liquid and polymer powder reacts together and to form extended polymer strands.  When strands try then it resembles a fingernail. 


The acrylic nail monomer is available in two varieties, light cured and no-light gels. Light cured gel nails  are hardened by using UV rays for around two minutes.  No light gel acrylic nails are cured by the use of unique gel activator  that could be brushed or sprayed on your nails. Gel nails are extremely comparable to regular acrylic nails. The both nails can be filed into varies shapes like square, pearl or round shape.


If you able to apply acrylic nails properly with the correct quantity and primers, it does not etch your nails bed. But you should remember that, you need to avoid the skin contact to reduce the reaction of allergy. During the time of nail design, generally, gel nails applied without a primer and it does not leave any hard impressions. But the wrong application of primer can cause the damage to the nail beds and it leaves an impression on the nail. There also have a result of fungus infection.


You can get advantages by selecting gel finger nails over acrylic. The largest benefit with the gel nails have, it looks like natural nails. They look thin with a glossy look. Due to the thin layer of acrylic nails, when you utilizing the nails, they don't need to be filled. You will find a disadvantage with the gel that is, they are more expensive but it is a great deal than other various artificial nails.

Gel nails never include the polish, which means you have to create them more frequently. If your nails break, they overlook to shatter, that means you can't execute a self-fix job. You may need to go to the nail salon and make a replacement of your broken nail. Products or services other store room of artificial nails, there may have a danger of establishing an infection at the time of application method.

Make sure to completely clean the nail beds by using isopropyl alcohol to apply artificial nails. Look after your fake nails by giving proper care. If you determine yourself to take away your false nails, then you should go to  a salon, they will do the rest work.

Friday 11 March 2016

The Top Five Bridal Manicures

Of course, everybody wants an excellent wedding day with the unique and perfect wedding gown, hairstyle, make-up, and accessories. But some brides give the special look to the perfect bridal manicure. It is understandable that, it's such a busy day but a bride's hands are in the spotlight so it is very essential to get your perfect bridal manicure before you take a pose for photos.

Here the best five bridal manicures which will help you to find out the best for you.

Dazzling Manicure

If you want to give a dazzling look during your wedding day, then you should take a dazzling manicure to match your requirements. To create a dazzling look on your nails, Go for a silver glitter  combined with adornments. Make them place at your nail bed or you can place them on your nails tip. In both conditions, it will look fabulous or fantastic, whatever you can say.

Ombre Manicure

At the moment, ombre nails are the most popular nail design among the all the nail designs. This suitable for those who prefer minimalist chic. To create the wedding perfect combo, you should go for the soft pink or light lavender with milky white shades to create a perfect wedding effect. 


Pearl Manicure


Basically, some people like to give extra preference to wear pearl jewellery. If you also like to give prefer to pearl jewellery then you should go for the pearl manicure. There are many options for you if you choose pearl manicure but the best option may the tiny pearls in a heart shape on the pointer finger and the left nails decorated with studs and glitter. For a normal or very simple version, paint all nails with light pink or white shade and make a pearly accent nail of each hand.

Silver Manicure

Silver manicure also  a good option for you. You can go for a silver metallic or silver glitter manicure. Also, there has an option of 3D glitters which is very popular into young generation. Your beautiful bridal nails will sparkles brighter than any disco light in your reception room.


French Manicure

If you are looking for something classic and feminine, try a French manicure. Just simply add a thin silver glitter line at your nail tip.  To bring this look at the next level, you can add a crystal in the middle of the silver line on each nail. A French manicure kit can give an extraordinary creative look at your wedding night.

Monday 15 February 2016

Must-Known Details About Acrylic Nails

Want to have stunning acrylic nails on your own? If so, then you first know the process to create this type of product. You need to use acrylic nail powder, an exclusive nail product which is mostly used  to protect your nails as well as improve appearance of your nails by all possible means. Here are a few important facts you should be aware about these acrylic nails.

How it is prepared?

The key ingredient that is mostly used in it is polyethylmethylmethacrylate , which can be called PMMA. This ingredient is a mixture of two kinds of monomers namely methyl methacrylate and ethyl methacrylate. Plus, it consists of other elements like benzoyl peroxide, benozophenone-1 and so on. There are a few manufacturers who also use additional ingredients in order to suit the requirements of diverse customers. For desirable results, the experts mix up acrylic powder and acrylic nail monomer liquid that also consists of extra ingredients. All these ingredients help to combine molecules, avoid damage as well as expand liquids on your nails by all possible means. Throughout the procedure, benzoyl peroxide plays the role of catalyst thereby helping this monomer to create net like connections in between the powder particles. As a result, the resin also is hardened successfully. 


How do you apply acrylic nail on your fingertips?

Like other salon professionals, you can make use of acrylic nail powder and liquid monomer with a soft brush  for decorating nails. This mixture is often applied from base of nail to top portion or even it may be shifted from middle part in an outward direction. Those who make use of these nails must know the right amount of acrylic powder that may be applied and that they must check out that product should not be wasted by any means.

If you do not wish to spend your time on salon and if you also do not wish to use this item, it is advisable that you should buy the product as quickly as possible. Many people think that application of nail powder can be a good option. The reason is simple because whenever the nail grows, you can easily fill up gaps that are usually made at bottom portion of nails with extra amount of nail powder. There is hardly any need for you to go crazy to fix up appointment with nail professional. All you need is to take up the responsibility to clean your nails as well as keep them in perfect condition as much as they can. 


Do you want to buy high quality nail supply products? Are you planning to buy SNS powder gel nails? This reputable company is dedicated in selling acrylic nail monomer, nail powder, primer and other nail items at affordable price rates. Go and buy your favourite product as soon as possible.

Tuesday 19 January 2016

Smart Tips For Creating French Tipped Nails

There can be absolutely no reason why you will not able to create stunning French tipped nails by yourself. There are multiple products available in the market that help you to get these spectacular nails within short period of time. However, it is advisable that you should first learn about the vital steps you need to follow to create them and enhance your look and appearance in the best possible way. Regular practice and suitable products allow you to get nails you always desire for.

First of all, you should wipe nails with high quality remover. It helps you to remove debris or your existing polish within short span of time. Make sure that you should take fingernails in sink and then you should run water to ensure that the remover can be washed out properly.

You should dip the brush in white coloured nail polish and you should find out that two or three swipes can cover up the tip of the nails in the best possible way.

Your next step is to push  nails you want to to paint with knees gently. Once you complete it, you should start your work with paintbrush that lies horizontally on any one side of nail. You should swipe polish along the nails.  

Make sure that you fill up blank space or spots with little bit of dip gel nail polish. You should continue with this procedure with your hand.

You should switch both your hands as well as your knees and also start the entire process for one more time. While using non-dominant arm for painting, you will be able to make nail painting quite steady thereby holding brush in the right place as well as allowing the knees to move from the fingers slowly. It will create same kind of swiping movement but you should remove wobbliness that often results from non-dominant arm.

Add one coat of nail paint to your hand, you have actually started with. You may use little amount of paint and you also do not need to follow white line you have created during your initial coating procedure. You should actually wait for at least fifteen to twenty minutes and you should allow it to become dried up properly. You should not touch anything during this particular time period.

In order to find out if your nails are drying up properly you need to swipe top coat of nail polish on nail of little finger of first hand you just have started with. For creating French tipped nails or gel powder nails you can also take the help of salon professionals at any point of time. If it fails to smudge or even smear, it is vital that you should proceed on with other fingers. You should do same thing with another hand as much as you can.

All the nails become dried up within short period of time. You should dip ear swab inside remover. You should also blot excessive remover as well as clean the corners or even nail beds that you may have painted just by accident.

If you wish to buy high quality nail products then you should contact Revel Nail without any kind of delay. Starting from acrylic nail monomer to dip powder, you will get everything at reasonable prices. Aspire for stunning nails and improve your look as a whole.